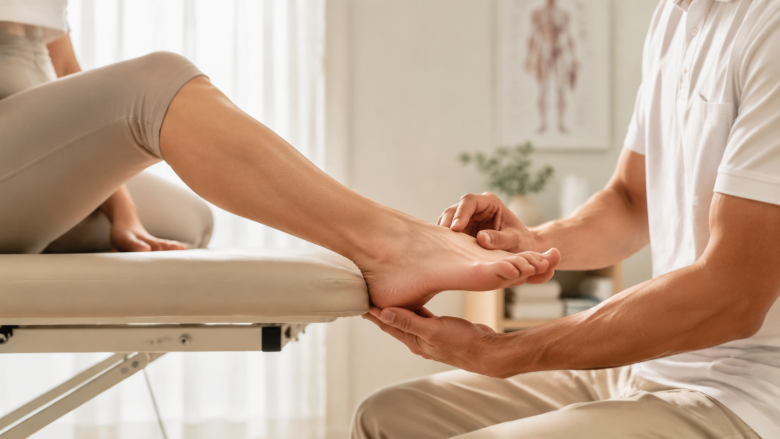
Why Gentle Movement Is the Missing First Step in Ankle Rehab
If you've sprained your ankle and now feel like it might give way on stairs, uneven sidewalks, or even flat ground, you already know the drill: "do your strengthening exercises, work on balance, walk more." But what if the standard advice feels too intense, too early, or even scary? That's where gentle movement for ankle instability comes in. I'm not talking about lazy stretching or just "taking it easy." I'm talking about a deliberate, slow, and neurologically precise way to retrain your ankle's communication with your brain. After a year of working with my own stubborn ankle and dozens of clients with chronic instability, I've learned that the fastest path to stability often starts with the slowest movements.
Most rehab programs jump straight to resistance bands, single-leg squats, and hopping drills. For many people - especially those with high fear or lingering pain - that approach backfires. The joint braces, the muscles tense, and the brain stays in protection mode. Gentle movement, done with intention, bypasses that defense mechanism. It teaches your nervous system that the ankle is safe, that motion is okay, and that you can trust the joint again. This article walks you through a four-phase framework that prioritizes control, sensory input, and confidence over intensity. You'll learn exactly what to do, how to progress, and why "10 seconds of controlled attention" beats "20 reps of sloppy effort" every time.
Your baseline isn't 10 reps. It's 10 seconds of controlled, pain-free attention. Master that first, and strength will follow.
Why Typical Ankle Rehab Fails the Fearful or Pain-Sensitive Ankle
The standard protocol after an ankle sprain usually looks like this: rest, ice, compression, elevation (RICE), then a week later you're told to do alphabet exercises, calf raises, and balance on one foot. That works if your ankle is simply weak. But if you've had repeated sprains, or if the initial injury was severe, there's often more going on. The ligaments may be lax, but the bigger problem is a loss of proprioception - your brain's ability to sense where your ankle is in space. Without that feedback, no amount of strength will prevent the next roll.
Here's what most programs miss: they treat the ankle as a mechanical hinge that needs to be tightened. But the ankle is a sensor. It's packed with nerve endings that tell your brain about joint position, tension, and movement. When you injure it, those nerves get confused. They start firing too much (pain) or too little (numbness). Gentle movement is the only way to retrain those signals. It's not about loading the joint; it's about re-mapping the brain-ankle connection.
My Own Wake-Up Call with a "Simple" Sprain
I remember stepping off a curb in 2019 - nothing dramatic, just a slight misstep. My ankle rolled outward, I felt a pop, and within an hour it was the size of a tennis ball. The doctor said it was a moderate lateral sprain and prescribed physical therapy. At my first session, the therapist had me do 3 sets of 15 banded eversion and 30 seconds of single-leg balance. I couldn't even lift my foot without pain, let alone balance on it. He told me to "push through the discomfort." I did. The next day, I couldn't walk. That experience taught me that intensity is not the answer when the nervous system is still in shock.
What worked instead was a slow, almost embarrassingly simple approach. I started by just wiggling my toes and doing tiny ankle pumps in bed. Then I moved to drawing small circles with my foot. It took weeks to graduate to standing on one foot with my hand on a wall. But every step was pain-free. And here's the surprising part: after six weeks of these gentle movements, my ankle felt more stable than it had after three months of aggressive rehab. The difference was that I was teaching my brain to trust the joint again, not just strengthening the muscles.
The Gentle Movement Framework: Four Phases of Neuromuscular Re-Education
This framework is built on the idea that you must re-establish a pain-free, controlled range of motion before adding any load. Each phase has specific movements, cues, and progression criteria. Take your time. There's no award for finishing fast. The goal is to walk away from each session feeling more connected to your ankle, not exhausted.
Phase 1: Micro-Movements in a Pain-Free Zone
The first phase is about waking up the joint without triggering any protective spasm. You're not stretching or strengthening. You're just moving the ankle through its available range, staying well within the pain-free envelope. This phase often lasts 1-2 weeks, but it can be longer if your ankle is still swollen or tender.
- Ankle pumps with a twist: Lie on your back with your legs extended. Point your toes away from you, then flex them back toward you. But don't rush. Spend 5 seconds moving in each direction. Focus on feeling the movement at the ankle joint, not in your toes or calf. Do 10 slow repetitions, twice a day.
- Foot circles (C-curves): Instead of drawing a big circle with your foot, imagine drawing a small letter "C" on the wall with your big toe. Start at the top, sweep to the right, then down and back. Reverse direction. This isolates the ankle's rotational movements - the ones that are most often lost after a sprain. Keep the range tiny, about the size of a quarter. Do 5 circles each way.
- Toe spreads and gathers: While seated, place your foot flat on the floor. Try to spread your toes apart as wide as possible, hold for 3 seconds, then relax. Then try to gather them together, like you're picking up a small marble. This might seem unrelated, but the small muscles in your foot are your ankle's first line of defense. They're often the last to recover.
What to watch for: If any movement causes a sharp pain or a feeling of "giving way," you're moving too far or too fast. Reduce the range by half and try again. The goal is to feel a gentle awareness, not a stretch. If you're completely pain-free, you can move to Phase 2 after a few days.
Phase 2: Controlled Arcs and Weight-Bearing Awareness
Once you can move the ankle through its full range without pain, it's time to add a hint of load. But we're still not talking about standing. This phase introduces partial weight-bearing and more precise control. It typically lasts 1-3 weeks.
- Heel glides: Sit on a chair with your foot flat on the floor. Slowly slide your heel backward, bending your ankle so your knee moves toward your toes. Then slide your heel forward, straightening the ankle. The key is to keep your heel in contact with the floor the whole time. This works on dorsiflexion - the motion you need for climbing stairs or squatting. Do 10 slow glides, holding the end position for 3 seconds.
- Seated weight shifts: Sit with both feet flat. Gently shift your weight onto one foot, pressing down through the heel and the ball of the foot. Hold for 5 seconds, then shift to the other side. Feel how the ankle accepts the pressure. Do 10 shifts per side. This begins to train the ankle's ability to sense pressure changes.
- Partial calf raise with support: Stand facing a counter or wall, holding on with both hands. Slowly rise up onto the balls of your feet, but only halfway - not a full raise. Hold for 3 seconds, then lower. The support takes most of your body weight, so you're just giving the ankle a gentle load. Perform 8-10 reps.
What to watch for: If you feel any clicking or catching, slow down. A slight creaking is normal, but a painful click is a sign that a tendon is slipping. That's when you should back off and consult a professional. Also, avoid holding your breath. Exhale as you move into the harder position.
Phase 3: Single-Leg Balance with Support
Now we're getting to the heart of proprioception. This phase is about teaching your brain to stabilize the ankle while it's under your full body weight - but with a safety net. You'll use a wall, a counter, or a sturdy chair for support. This phase can last 2-4 weeks, depending on your confidence.
- Supported single-leg stand: Stand next to a counter. Place one hand on it for balance. Lift the uninjured foot slightly off the floor, so you're standing on the injured ankle. Keep your knee soft (not locked). Hold for 10 seconds. Then switch sides. As you improve, gradually reduce the pressure you put on the counter - from a full hand to two fingers, then to one fingertip. The goal is to stand without touching, but that comes later.
- Eyes-open to eyes-closed: Once you can hold a supported single-leg stand for 30 seconds without wobbling too much, try closing your eyes. This removes visual input and forces your ankle's proprioceptors to work harder. Keep your hand on the counter first. You'll likely wobble more - that's fine. The wobble is your brain recalibrating. Hold for 5 seconds with eyes closed, then open them. Work up to 10 seconds.
- Mini squats on one leg: With your hand on the counter, start in a single-leg stance. Slowly bend your knee and hip, squatting down only a few inches. Keep your heel on the floor. Press back up. The movement should be slow and controlled, taking 3 seconds down and 3 seconds up. Do 5-8 reps. This adds a dynamic element to balance.
What to watch for: The most common mistake here is gripping the floor with your toes or tensing your calf. That's a sign that your ankle is afraid. Instead, think about spreading your toes and letting your ankle do the work. If your ankle starts to roll inward or outward, stop and reset. You should feel a gentle fatigue in the muscles around the ankle, not a sharp pain.
Phase 4: Dynamic Gentle Movement in Daily Life
The final phase bridges the gap between controlled exercises and real-world movement. You're not running or jumping yet - but you're walking, climbing stairs, and navigating uneven surfaces with intention. This phase is ongoing, and it's where you'll notice the biggest difference in your confidence.
- Slow, mindful walking: Walk at a pace where you can pay attention to each step. Feel your heel strike, your foot roll through, and your toes push off. If you're on a flat surface, try walking on a slightly uneven surface - like a thick rug or a mat - to challenge your ankle. Do this for 5 minutes a day.
- Stair practice with a rail: Go up and down stairs one at a time, using the railing for support. Slow down to a pace where you can control the lowering and lifting. Pause at the bottom of each step for 2 seconds. This trains the ankle to accept load at different angles.
- Gentle side steps: Stand with feet hip-width apart. Take a small step to the side, keeping your toes pointing forward. Then bring the other foot to meet it. Do 10 steps each way. This works on the ankle's ability to control lateral movement - the exact direction that failed during a sprain.
What to watch for: If you feel a sense of instability or "looseness" during any of these, that's a sign to return to Phase 3 and spend more time on balance. But don't stop moving entirely. Simply reduce the challenge. For example, if walking on a rug feels scary, go back to a flat floor and walk slower.
The Traffic Light System: How to Tell Pain from Discomfort
One of the hardest parts of gentle movement is knowing when to push and when to back off. I use a simple traffic light system with my clients. It prevents both under-doing and over-doing.
- Green light: The movement feels okay - maybe a mild stretch or muscle fatigue, but no pain. You can continue and even progress slightly.
- Yellow light: There's a mild ache, a pulling sensation, or a feeling of instability that doesn't escalate. This is a warning. Don't push further. Hold the position or reduce the range. Finish the set but don't add reps.
- Red light: Sharp pain, a pop, or a feeling of the ankle giving way. Stop immediately. Rest for a day or two, and consider dropping back a phase. If red light episodes happen often, see a physical therapist.
This system works because it respects the difference between discomfort (which is often safe) and pain (which is a protective signal). The key is to stay in the green zone as much as possible. That's where the nervous system learns that movement is safe.
Why Fear Is the Real Barrier (and How Gentle Movement Dissolves It)
If you've had multiple ankle sprains, you know the feeling of walking on an uneven sidewalk and suddenly bracing, anticipating a roll. That's not just weakness - it's fear. Your brain has tagged the ankle as an unreliable joint, and it's constantly sending out "watch out" signals. This hyper-vigilance causes muscle tension, which actually makes the ankle less stable.
Gentle movement is the antidote to that fear. When you move slowly and stay within a pain-free range, you're giving your brain new data: "The ankle moved, and nothing bad happened." Over time, that positive feedback overrides the old fear memory. It's a form of graded exposure therapy. You're not ignoring the fear; you're teaching your brain to update its expectations.
A study published in the Journal of Athletic Training found that athletes with chronic ankle instability showed reduced fear of movement after a 6-week proprioceptive training program that emphasized slow, controlled movements. That's exactly what this gentle movement framework does. It's not about being weak; it's about being smart enough to let your nervous system catch up.
Common Mistakes That Sabotage Gentle Ankle Rehab
Even with the best intentions, people make mistakes that slow their progress. Here are the ones I see most often:
- Too much range too soon: You might feel good one day and decide to do a deep calf stretch. That can irritate the joint and set you back. Stick to the prescribed range - small is better.
- Ignoring the foot: The ankle doesn't move in isolation. The small muscles in your foot and the way your toes grip the ground are crucial. If you skip toe spreads and foot arches, you're missing a key piece.
- Holding your breath: Tension in the upper body translates to tension in the ankle. Breathe slowly and rhythmically during every movement.
- Comparing your progress: Everyone's timeline is different. Your neighbor might be back to running in 3 weeks; you might need 3 months. That's fine.
- Stopping too early: Once you feel stable, you might be tempted to quit. But the neural pathways need repetition. Continue the gentle movements even after you're back to normal activities - maybe just 2-3 times a week.
How to Integrate Gentle Ankle Movement with Your Daily Routine
Consistency beats intensity. You don't need to set aside an hour for this. In fact, short, frequent sessions work better for retraining the nervous system. Here's a sample routine that fits into a busy day:
- Morning (5 minutes): While still in bed, do ankle pumps and foot circles. These wake up the joint.
- Midday (5 minutes): At your desk, do seated heel glides and toe spreads. If you work at a desk all day, you might also benefit from our guide on 5 gentle stretches for desk workers to prevent stiffness elsewhere.
- Evening (10 minutes): After dinner, do supported single-leg balance and slow walking. This is when you can focus on the more challenging phases.
This adds up to 20 minutes a day, but it's spread out so it doesn't feel overwhelming. And because the movements are gentle, you won't be sore the next day.
When to Seek Professional Help
Gentle movement is a powerful tool, but it's not a substitute for medical care in certain situations. If you experience any of the following, stop and consult a physical therapist or orthopedic specialist:
- Persistent swelling that doesn't go down after 2 weeks
- Sharp pain that occurs with any movement
- A feeling that the ankle is completely unstable, even with support
- Numbness or tingling in the foot
- A history of fractures or suspected ligament tears
A professional can assess the specific structures involved and help you modify this framework to your needs. They might also recommend additional tools like kinesiology tape or bracing, but those should complement - not replace - gentle movement.
The Science Behind Slow Movements: Why "Less Is More" for Neural Re-Training
Your brain doesn't care about how many reps you do; it cares about the quality of the signal. When you move slowly, you give your sensory nerves more time to fire and send accurate information to the brain. This is called sensory-motor integration. Fast, jerky movements overwhelm the system and trigger protective reflexes. Slow, controlled movements allow the brain to process the input and adjust muscle activation accordingly.
Research in motor learning supports this. A 2021 review in Sports Medicine found that slower movement speeds were more effective for improving joint position sense - your ability to know where your ankle is without looking. This is exactly what's needed to prevent future sprains. So when you're doing a 10-second ankle pump, you're not being lazy. You're giving your brain a high-fidelity signal that it can use to build a better movement map.
A Note on Pain-Free Range vs. Full Range
After an injury, you might have lost some range of motion. You might not be able to bend your ankle as far forward or back as your uninjured side. That's normal. The goal of gentle movement is not to force the range back immediately. It's to restore pain-free range first. Once you can move without pain, the nervous system will gradually allow more range on its own. If you try to stretch beyond the pain-free zone, you'll trigger a protective spasm and lose progress.
Think of it like this: your ankle has a guardrail. The pain is the guardrail telling you where the edge is. Gentle movement teaches you to walk along the road, not hit the guardrail. Over time, the guardrail moves further away as your tissues heal and your brain trusts the joint again.
Realistic Timelines: What to Expect
Everyone heals at their own pace, but here's a rough guide based on my experience and the research:
- Week 1-2: Phase 1 micro-movements. You may still have some swelling and stiffness, but you should be able to do the movements without pain.
- Week 3-4: Phase 2 controlled arcs. You can start weight-bearing activities like walking normally, but with attention.
- Week 5-8: Phase 3 single-leg balance. You'll notice improved confidence on stairs and uneven ground.
- Week 9-12: Phase 4 dynamic movement. You can return to most daily activities without fear, but you'll still benefit from maintenance work.
These are not strict deadlines. If you're still in Phase 1 after 3 weeks, that's okay. Listen to your body. The worst thing you can do is rush and reinjure.
Final Thoughts: Gentle Is Not Weak
If you've been told to "just push through" or "toughen up," I want to give you permission to ignore that advice. Ankle instability is a complex issue that involves ligaments, muscles, and most importantly, your nervous system. Gentle movement is not a cop-out; it's a sophisticated approach that respects the brain's role in recovery.
Start with 10 seconds of controlled attention. Build from there. You'll likely find that as your ankle becomes more stable, your confidence grows, and the fear that once shadowed every step begins to fade. And if you're looking for more ways to incorporate gentle movement into your day, especially if you spend hours at a desk, check out our article on 10 easy ways to add movement daily for ideas that complement your ankle rehab.
Remember, the goal isn't to become an athlete overnight. It's to walk down the street without thinking about your ankle. That's a victory worth taking slowly.